
This lesson is made with PSPX9
But is good with other versions.
© by SvC-Design

Materialen Download :
Here
******************************************************************
Materials:
achtergrond.jpg
Autumn_StillLife_na_05.09.2008.pspimage
paper bride tubed by liza 17-6-2010.psp
sel-1-les lady with a paperdress.PspSelection
******************************************************************
Plugin:
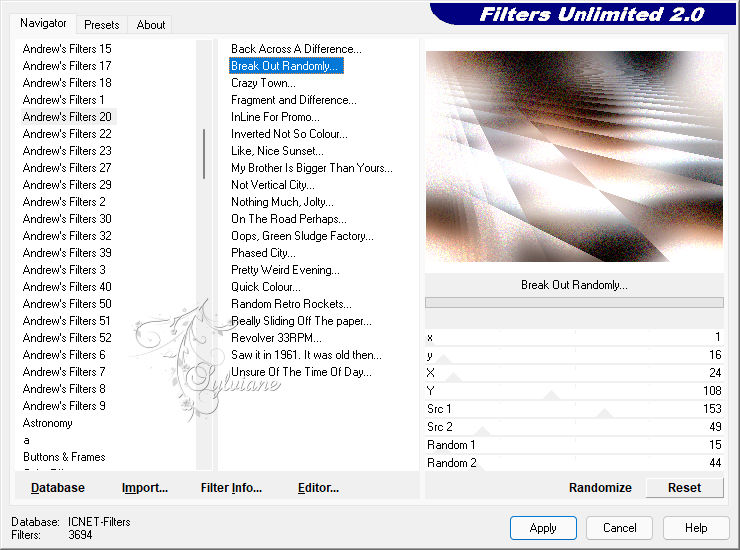
Plugin – Andrews 20 - Break Out Randomly
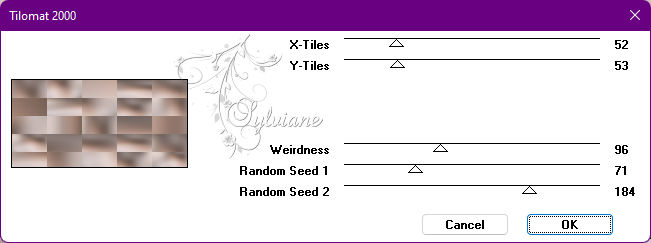
plug-in VM - Distortion - Tilomat 2000
Plugins - Alien Skin - Snap Art - Oil Paint
******************************************************************
color palette
:

******************************************************************
methode
When using other tubes and colors, the mixing mode and / or layer coverage may differ
******************************************************************
General Preparations:
First install your filters for your PSP!
Masks: Save to your mask folder in PSP, unless noted otherwise
Texture & Pattern: Save to your Texture Folder in PSP
Selections: Save to your folder Selections in PSP
Open your tubes in PSP
******************************************************************
We will start - Have fun!
Remember to save your work on a regular basis
******************************************************************
Foreground: #27160e
Background: #ebe1e2
Gradient: sunburst - angle 54 - repetition 1 - horizontal 50 - vertical 100

1.
Open a new transparent image of 700 x 500 px.
Fill with gradient.
Layers - New Raster Layer
Selection - Select All
Open paper bride tubed by liza 17-6-2010.psp
Edit – Copy
Edit - Paste into selection
Selections - select none
Effects - Image Effects - Seamless Tiling - Default.
Layers – merge – merge down
Adjust - blur - gaussian blur
Range: 40.
2.
Layers - Duplicate
Plugin – Andrews 20 - Break Out Randomly (see screen)

Select tool - to scale.
Pull the center block down to 350.

3.
Activate the bottom layer.
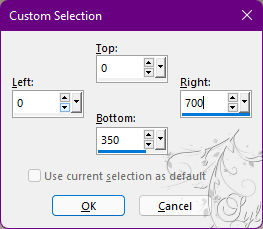
Activate Selection - Custom selection

Selections – Promote selections to layer
plug-in VM - Distortion - Tilomat 2000 - set the X tiles to 52 - Y tiles to 53. Leave the rest as it is

Selections - select none
Layers – arrange – bring to top
4.
Layers - New Raster Layer
Selections - Load / Save - Load selection from disk - sel-1-les lady with a paperdress.PspSelection

Fill the selection with foreground.
Selection - modify - contract -2 px.
Press delete on your keyboard.
Selections – modify – expand - 1 px.
Open achtergrond.jpg
Edit – Copy
Edit - Paste into selection
Adjust hue and saturation: 18 - 42.
Selections - select none
Activate the layer below
Effects - 3D Effects - Drop Shadow
-4/-2/100/3 color:#000000
5.
Layers - New Raster Layer
Selection - Select All
Open achtergrond.jpg
Edit – Copy
Edit - Paste into selection
Effects - Distortion Effects - Wave.
Selections - select none
Set the layer opacity to 48 – blend mode to soft light.
Layer – merge – merge all (flatten)
7.
Open Autumn_StillLife_na_05.09.2008.pspimage
Edit – Copy
Edit - Paste as new layer
Resize 75%, resize all layers unchecked.
Slide the tube nicely into place.
Drop shadow - everything is fine.
Open paper bride tubed by liza 17-6-2010.psp
Edit – Copy
Edit - Paste as new layer
Resize with 75% and again with 80%, resize all layers unchecked.
Move her to the right.
Effects - 3D Effects - Drop Shadow
12/-10/40/30 color:#000000
7.
Image - Add Borders – Symmetric -1 pix – color: background.
Click on shift and D on your keyboard put the copy aside for a while.
On the original creation.
Image - Add Borders – Symmetric - 50 pix – color: #27160e
Select the border.
Now take your copy - copy and paste into selection.
Plugins - Alien Skin - Snap Art - Oil Paint .
Selections - Invert
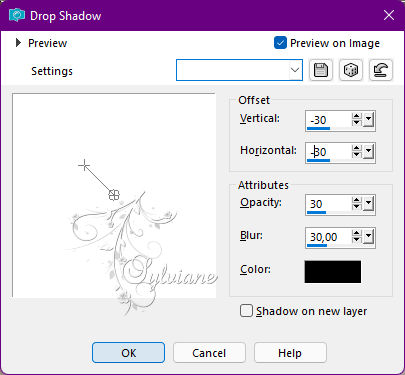
Drop shadow - all sliders at 30
 .
.
Repeat with vertical and horizontal at minus 30.

Selections - select none
Put your name on your creation and make it 600 px longest side.
Save your work as JPG.
Back
Copyright Translation © 2022 by SvC-Design